Work In Progress
Home Art Gallery Work in Progress Meet the Artist Contact the Artist
This section is very exciting for me to share with you. For those art enthusiasts who are not currently creating your own body of work, these "in progress" comments may be an enlightening eye-opener. For those of you who do actively strive to live through a creative mode, I applaud your efforts and encourage you to persevere.
|
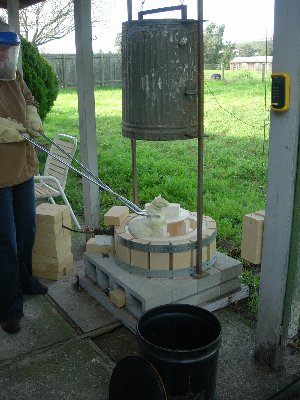
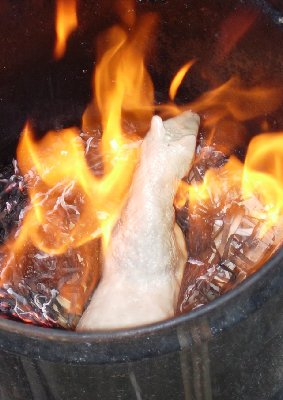
In 2005 108 Hands Touching Life was my first conceptual series that was born out of an opportunity to study at the world renoun Pilchuck Glass School, in Stanwood, WA. When I returned home, I was so inspired to begin developing a vision that would incorporate various poses of life-size kiln-cast glass hands with Raku ceramic elements, resulting in an exhibition offering "108 hands" expressing gentle human experiences. This Work In Progress section is an overview opportunity for you to take a peek at the ins and outs of this challenging journey. To begin building the bridge between kiln-cast glass and Raku ceramics, all I needed (I thought) was clay, glazes, a propane Raku kiln with reduction bins for the Raku elements, plus an electronically controlled kiln, casting glass, plaster molds, molding alginate and casting wax for the glass hands, and of course the backbone to any project, the journal to keep sketches, firing schedules, materials used, etc. - everything documented and organized. Ten months later, the Raku kiln (top right) was successfully designed and installed, and is still going strong on our back patio. Traces of wax can now be found on the workroom floor, and bins of mold making materials are competing for space in my small studio but... we had lift-off. On to the next phase of this new endeavor. Because glass and clay expands and contracts in the kilns at very different rates, they can not be successfully fired together, so starting with the end in mind is unavoidable. Both materials must fit together perfectly for the finished piece to be a success. To do that, the Raku element is always where each piece must begin. Here I am (right) transfering an 1800 degree Raku fired horse into its reduction bin (below left), where it's radiant ignites the oxygen thirsty paper. The lid is quickly placed on the bin, locking the smoke inside, and then after the fire and smoke subsides, and the horse becomes cool enough to touch (below right), it is then scrubbed clean with soap and water. |
|
|
|
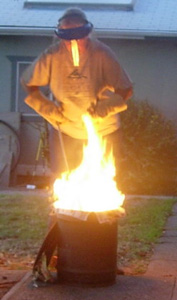
Pulling a piece out of an 1800 degree kiln is as dangerous at it looks so I welcome the protection of the safety equipment. During this firing, a rather large section of the horse's ceramic underside suddenly reacted to thermal shock and it popped off, making picking it up a tricky challenge. I've had great success with my firings nearly all the time, but it's impossible to know when the next unstable piece will suddenly be flying in my direction. It really doesn't take any more time to work safely and it goes without saying, "Better safe than sorry." |
| Making the Molds for Wax Casting | |
|---|---|
|
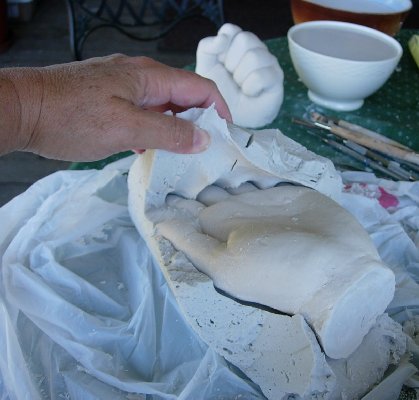
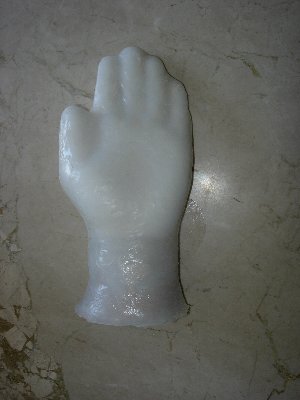
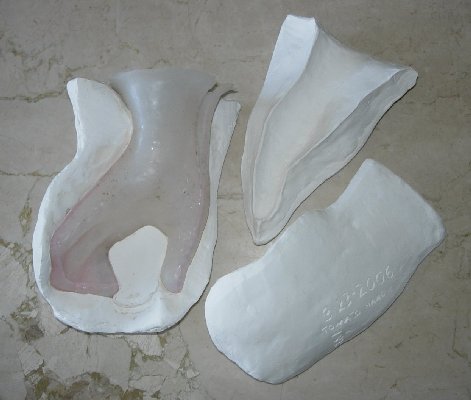
Next step is making the element that will be transformed into a piece of kiln-cast glass. There are several ways to go about creating these glass pieces. Since I'm aiming for realistic hands, I started by making a casting of my own hand with an alginate compound and plaster. That sounds simple enough but I have come to appreciate that the creative process usually has a mind of its own. Problem #1 - When my left hand is in the alginate, I only have one hand left to work the material. Another set of helping hands are priceless on form-casting day. Problem #2 - Poses have to factor in gravity. The air inside has to go somewhere when the plaster is poured into the alginate mold. If there are any floating up-turned finger tips, there will eventually be trapped air bubbles, which will lead to voids in the plaster (the finger tips) - and eventually the wax. Once the alginate casting mix is set and my hand is retrieved out of the alginate's grasp, a plaster mixture is poured into the void. I gently swish the plaster around and tap on the outside of the mold form to burp out as much air as possible. Then the mold is supported and left untouched for a few hour while the plaster sets up. When the plaster has finished curing (1-2 weeks depending on the weather), the alginate form is peeled away (top right), exposing the perfectly detailed casting. After the plaster hands have been extracted from the alginate mix, and all the imperfections have been corrected and mended as needed, it's time to start making either "waste molds" for one time use or "mother molds." that are used when more than one wax image will be made from an original casting - in my case, the same plaster hand. The pictured mother molds consists of the original plaster hand, an inner mold, that is made of silicone (2nd from top), and an outer mold, that is made of assembled plaster parts. Here is an image (3rd from top) showing the different sections and parts. Last is the assembled 4-part mother mold with the inner silicone form inside. |
I'm still amazed at how time consuming the construction of these mother molds take to make so I take a lot of precautions to ward off any damage being caused to these molds while they are in use or competing for storage space in my tiny studio. Below is the unaltered end result of a wax casting taken from the above 4-part mother mold. |
| Casting the Wax Form | |
|
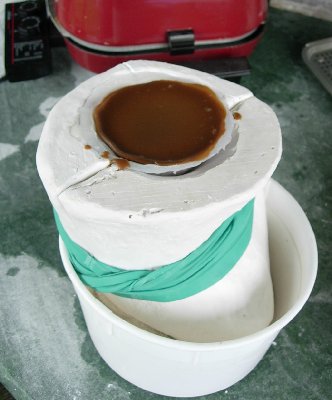
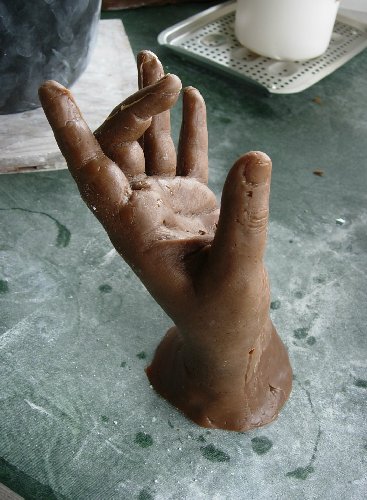
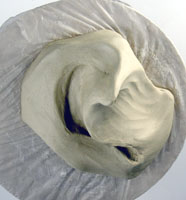
Wax is melted very slowly to no higher than 200 degrees. Because wax is highly flammable, it is melted in a double-boiler fashion, i.e. it's melted in a pan that is floating in water. I have created this double boiler effect by using an electric skillet to heat the water and another smaller metal loaf pan to hold the wax as it melts. When the wax is ready, it is poured into the center of the supported silicone and plaster mother mold (top,right) and left to cool completely before removing it from the molds. If all goes well (middle,right), I will end up with a casting like this wax hand. It's now ready to be finely finished before it has its "kiln-casting mold" or "waste mold" is applied and the wax image is melted away leaving a cavity for the melted glass to fill. The waste mold is then filled with glass chunks after being placed into the electronically controlled kiln to be fired and annealed for roughly 60 hours before the glass melting and annealing process is finished .... Then I will be able to remove the waste mold to take my first peek at the cast-glass results. It's this last step that I'm majorly stuck on. My waste molds so far have not successfully survived the wax melting process. That means heading back to the drawing board for this step before moving on. |
|
| Casting from Clay | |
|
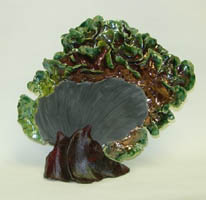
When waste molds are removed, casting "flashes" become obvious very quickly. All glass finishing is very time consuming and each flaw will need to be addressed with wet grinding and sanding before moving on to the final finishing steps of joining the ceramic and glass elements snuggly together. Tides of Change (right)was my first major success at having technique finally merge successfully with my estethic vision. "Tropical Currents" (right) is another one of my most evolved attempts to merge kiln-cast glass and ceramics together successfully without any waste mold failures. They both have a Raku fired ceramic element set into a cast-glass base. Because this base is also a one-of-a-kind, making a mother mold was not necessary. I was able to make the waste mold directly off of a clay form (processes below) and not wax - a wonderful shortcut, if I don't let the clay dry, i.e no shrinkage before the plaster is applied. There is never any end to the learning curve of an artform that is always evolving. When that challenge became exciting and energized to me to go further, I knew I had found a perfect lifetime match for my ambition as a sculptor. I know I will eventually return to working out the "lost wax" mold issues, but for now waste molds from clay seem to be the perfect alternative for my current body of work. |
|


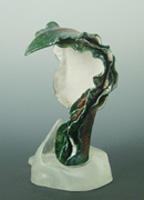
 Fitting ceramics to clay form |
 Ceramics removed for final once-over |
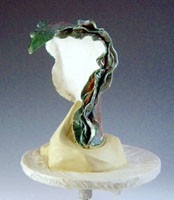
 Top view of clay form |
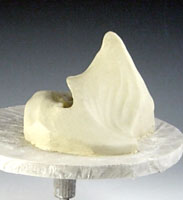
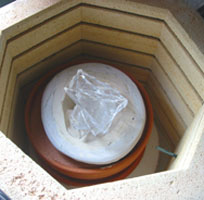 Leveling waste mold in sand filled pot |
Email Artist at: KindredFlamesArt@gmail.com